
How to Add Your First Product
Adding your first product to ClaimCart is quick and easy. This step-by-step guide will walk you through uploading a product photo, entering your product details, setting your inventory, and saving your first listing. In just a few minutes, your product will be ready for customers to claim from your storefront.
Go To Inventory
To add your first product, start by clicking Inventory in the left-hand menu.
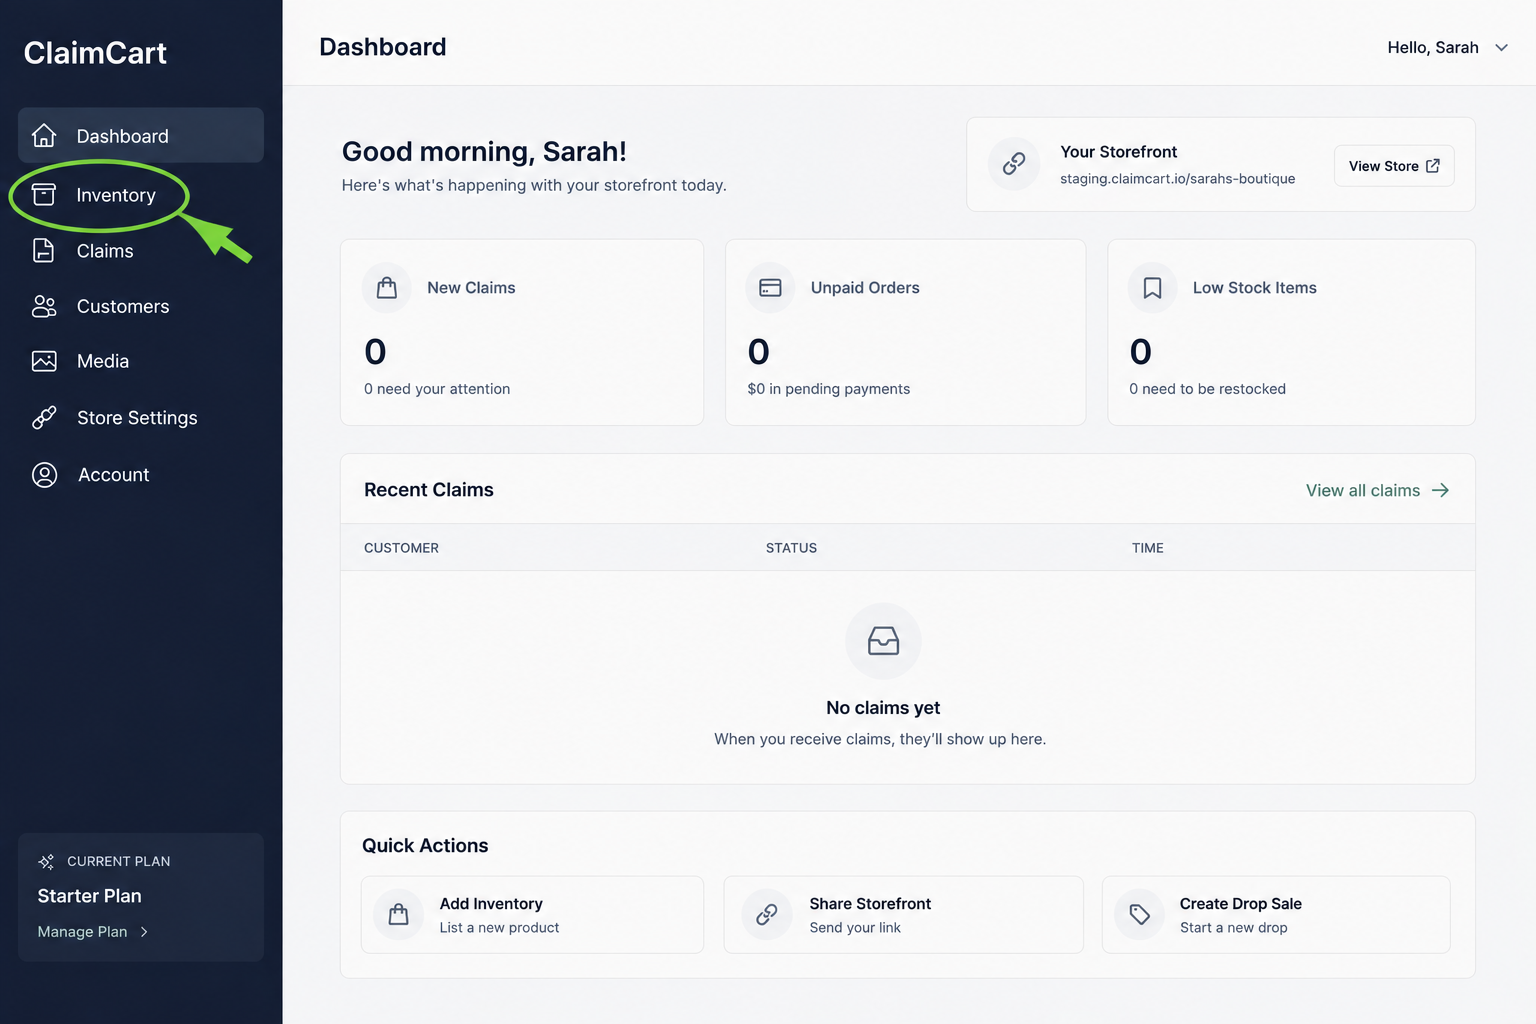
2. Click Add Inventory
Click + Add Inventory in the top-right corner to create your first product.
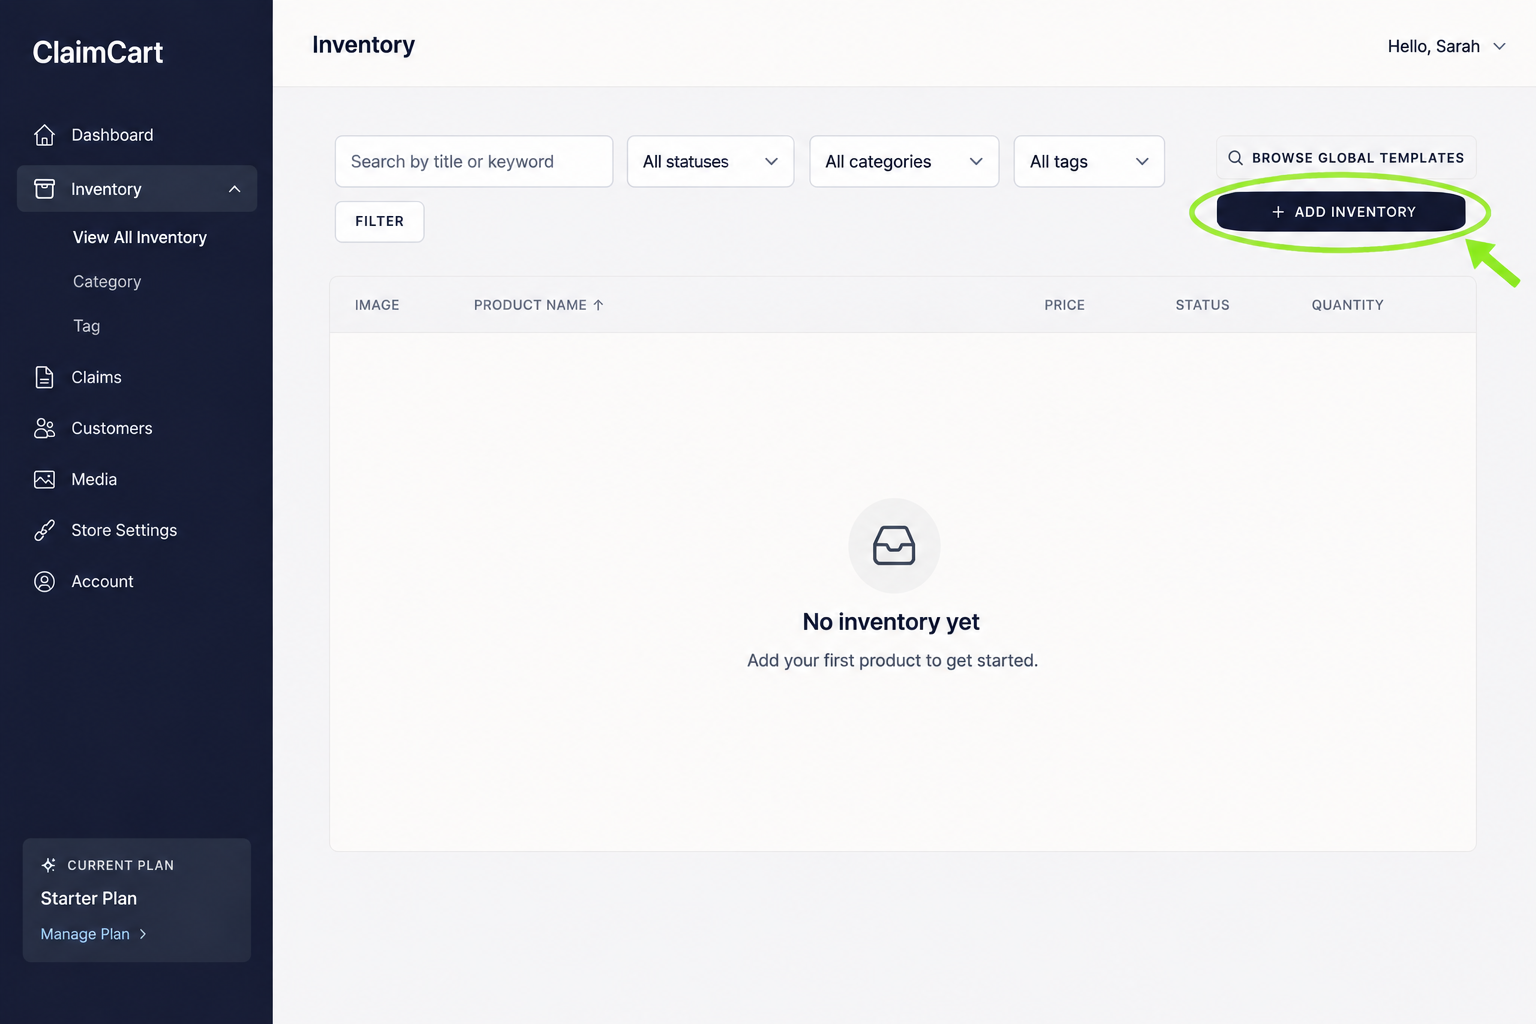
3. Complete Your Product Details
Upload a product photo, then enter your product name, description, price, quantity, and choose the appropriate status before continuing.
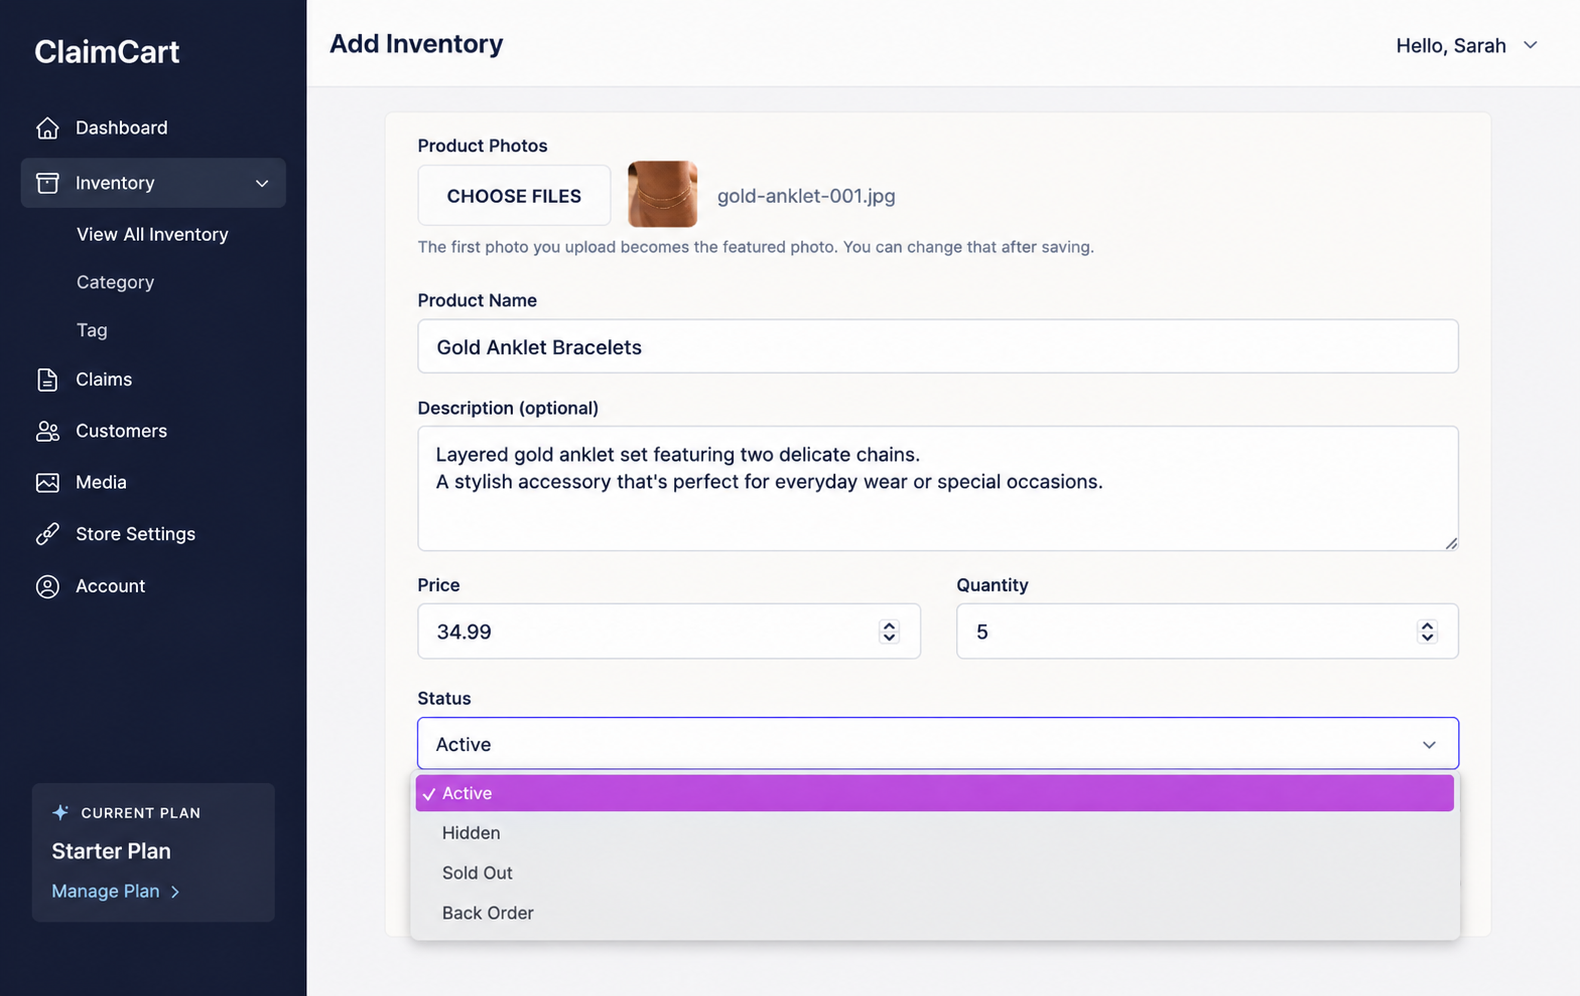
4. Add Categories and Optional Details
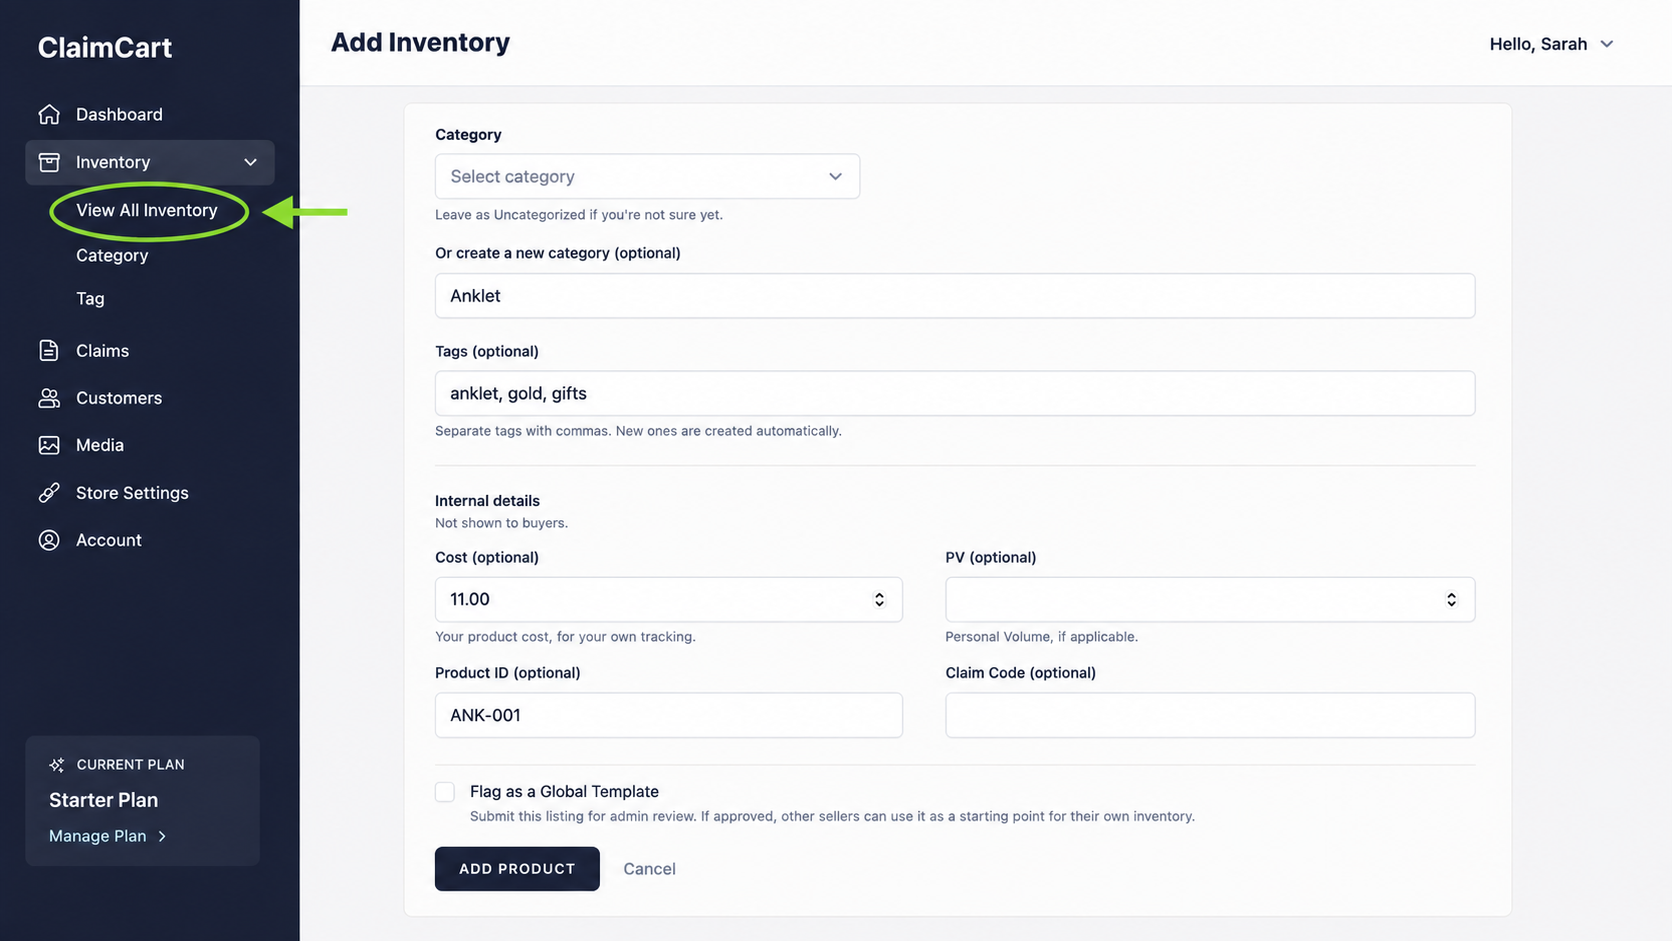
Create a new category if needed, then add any optional details such as tags, cost, PV, and a product ID. When you're finished, click Add Product to save your new product.
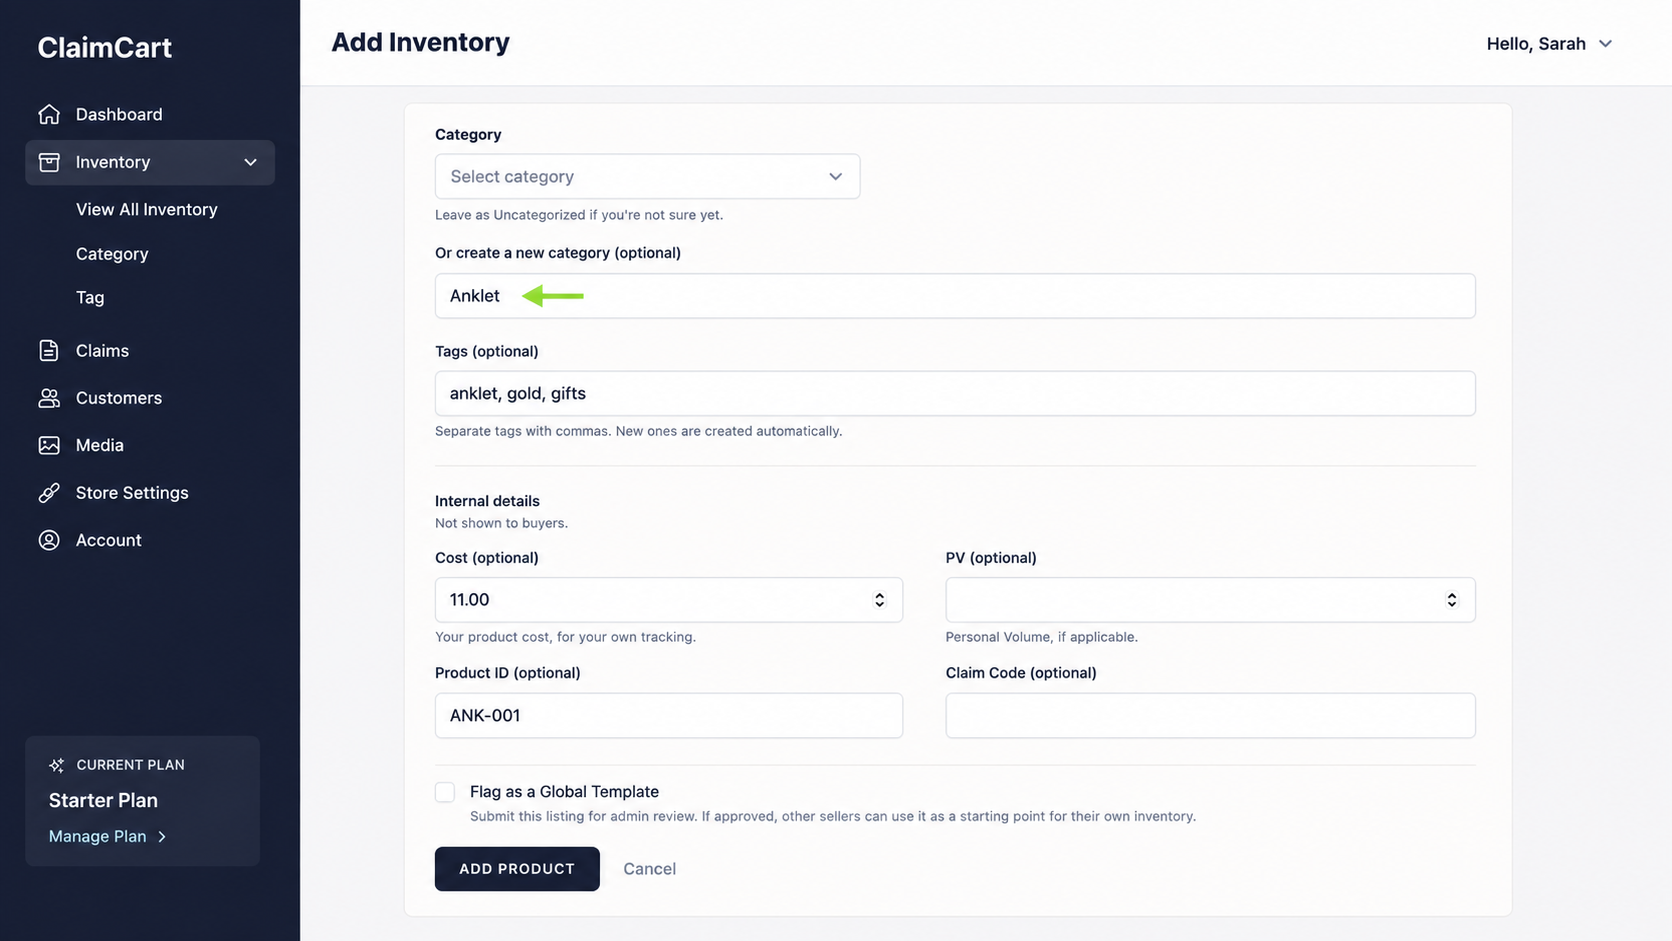
5. View Your Inventory
Click View All Inventory in the left-hand menu to return to your inventory and confirm your new product has been added successfully.
Need Help?
If your product doesn't appear in your inventory after clicking Add Product, try the following:
Make sure you've entered a Product Name.
Confirm you've uploaded at least one product photo, if required.
Refresh your browser and check your Inventory again.
Make sure the list is organized by last added
If the issue continues, contact the ClaimCart support team.